Implementing CI/CD pipeline with GitHub Actions, and GitHub Pages in a React app.


In this article, you will learn how to implement continuous integration and continuous delivery in your React application using GitHub Actions.
You will learn:
What is continuous integration (CI)?
What is continuous delivery (CD)?
How to use GitHub Actions for CI/ CD workflows
How to deploy React apps to GitHub Pages
At the end of this article, you should be able to implement continuous integration and continuous delivery in your React apps.
The article will be in two sections. The first section explains key concepts in continuous integration and continuous delivery. In the next section, we will use the knowledge of CI/CD to build and deploy a React app.
Prerequisite
To get the most out of this article, you should be familiar with:
Creating a repository on GitHub
Connecting your local repository with the remote repository
How to use Git for version control
How to create a basic React application.
Overview
Adding new features to software projects can be challenging. Multiple developers need to work on the assigned features, test, and finally integrate these features into the existing software.
On successful integration of the new features into the software, it needs to be deployed to the staging environment for further testing, then pushed to the production environment.
For widely used software with globally distributed end-users, adding new features to an existing product built by various developers can be prone to bugs, time-consuming and complex, and there shouldn't be any downtime during the deployment of the new features to the production environment.
To address this challenge, developers need to implement continuous integration and continuous development into their workflow. Continuous Integration (CI) and Continuous Delivery (CD) help solve the challenges with manual development, integration, and deployment of software by enabling developers to automate the software development cycle.
What is continuous integration (CI)?
CI is a practice where developers merge all their code changes into a central repository early and often. It is the use of automated tools to test each change you merge, insisting on the new code’s correctness before integration.
What problem does CI solve?
Generally, multiple developers work on different feature branches of the software for an extended period, and in isolation. When they have completely built that feature, they will all merge their changes to the main repository to be deployed to the production environment.
Merging the different branch features with the main branch can lead to code conflicts, bugs, and unexpected security concerns. These challenges can be time-consuming, and complex to resolve. With a large code base, there are high rates of failure and slower feature releases as it requires developers to cross-check every step and be vigilant during the integration. This makes it difficult to release new features to end users swiftly.
However, you can implement a process that enables each developer to push their changes to the main branch in small batches. That is the essence of CI.
Another critical part of CI is continuous testing, where the CI tool test the code for vulnerabilities throughout the development process. Both unit and integrated testing can be run automatically.
To summarize, the objective of CI is to help in the early detection and resolution of bugs, increase code quality, and ensure the code remains stable.

What is continuous delivery?
Continuous delivery (CD) is a practice where code changes are automatically built, tested, and released to the production environment. It ensures that software can be released frequently with little resistance.
CD is an extension of CI, it automates the deployment process by ensuring all code changes are deployed to a testing environment and or a production environment after the build stage.
Relationship between Continuous Integration, Continous Delivery, and Continuous Deployment
The three phases of an automated software release pipeline are:
Continuous integration
Continuous delivery
Continuous deployment
The continuous integration phase is when multiple developers work on separate features and when the feature is complete, merge their code with the central repository of a project.
Continuous delivery is an extension of continuous integration. With continuous delivery, the code changes are built, tested, and pushed to the staging environment. Continuous deliveries entail running automated building tools to package an artifact( an artifact may consist of the source code, dependencies, and other resources)to be delivered to the end users.
Continuous deployment is the last phase of the pipeline. It is responsible for automatically launching and distributing the artifact to end-users
With continuous delivery, the code is manually approved before it's pushed to the production environment. However, in continuous deployment, the code is pushed to production automatically without explicit approval
GitHub Actions Architecture: How GitHub Actions can be used for CI/CD
GitHub Actions is a continuous integration and continuous delivery (CI/CD) platform that enables developers to build, test, and deploy apps right in your GitHub repository.
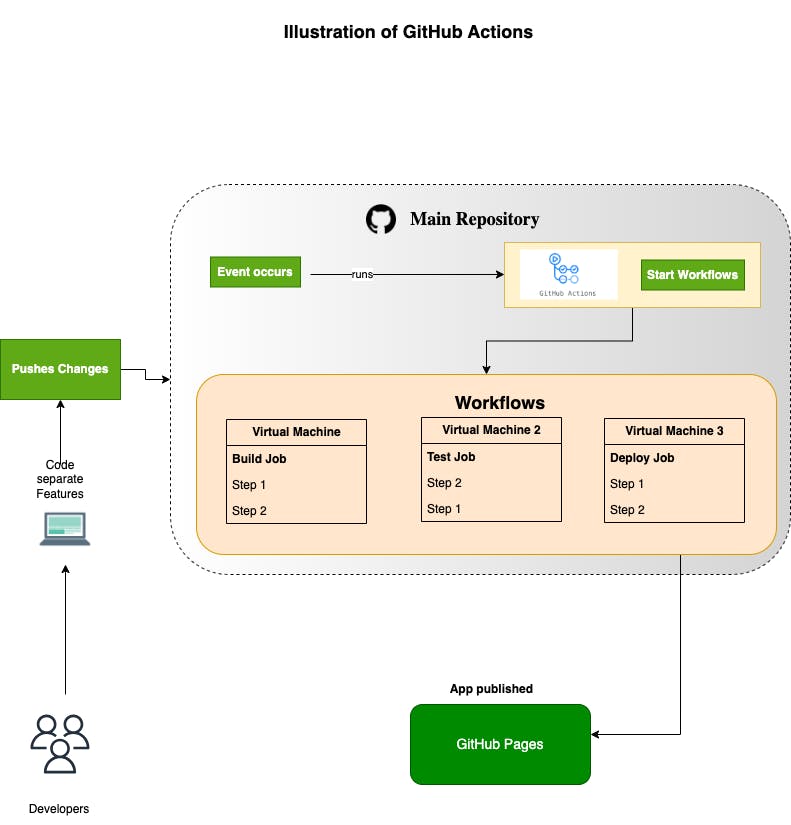
The CI/CD is achieved by using workflows. A workflow is an automated process that will run one or more jobs (tasks to be done). You can create workflows that build and test every pull request to your repository, or deploy merged pull requests to production. The workflows are defined inside a YAML file in your local repository and will be pushed to the GitHub repo.
Whenever an event occurs in your GitHub repository for instance, when a developer pushes code to a repository or submits a pull request the set of tasks outlined in your workflow automatically starts.
You can create multiple workflows in your repository. Below are examples of workflows you can create in GitHub Actions:
Build workflow: This helps us build our code from the source ensuring the code works well on all platforms and environments
Test workflow: This runs tests (unit and integrated) on every pull request to your repository ensuring the code is bug-free
Deploy workflow: This helps developers to deploy code to a production environment.
Notification workflow: This is used to send a notification when an event occurs in a repository.
In summary, using GitHub Actions developers can create a CI/CD pipeline to automate the software development lifecycle workflows.
It covers a couple of stages:
Source stage: At this stage, you develop or implement the required features using version control software like Git.
Build Stage: This step put together the source code with all its dependencies into an artifact (executable format)
Test stage: At this stage, you integrate automated testing to validate the quality of the code, and detect and fix bugs. Various tests can be executed at this stage, once the code passes the tests, it is ready to be deployed.
Deployment: The final stage is to automatically deploy the app to the staging or production environment.
Constituent of GitHub Action workflow file
Central to GitHub Actions are workflows. You can set up a workflow to be activated when an event occurs in your repository.
Below is an example of a workflow file. We will use this sample to explore the constituent of a workflow flow.
name: learn-github-actions
on: [push]
jobs:
  build-test:
    runs-on: ubuntu-latest
    steps:
      - uses: actions/checkout@v3
      - uses: actions/setup-node@v3
        with:
          node-version: '14'
      - run: npm i
      - run: npm run build
      - run: npm run test
name:
This represents the name of your workflow. When set, GitHub will display the name of the workflow in the "Actions" tab of your repository.
on:
The on will automatically activate the workflow based on the specified events. You can specify single or multiple events to trigger a workflow.
The syntax is as below:
on: event // for a single event
on: [event1, event2] // for multiple events
For example:
on: deletewill run a workflow when thedeleteevent occurs in your repository.on: pushwill run a workflow when you push code to the repository.on: [push, fork]will run a workflow when a push is made to any branch in the repository or when someone forks the repository.
jobs:
jobs are the building blocks of the workflows. It represents a set of executable steps. Each job consists:
a
namea
runnerset of
step,
The name should correspond with your objective. In the code snippet below, we define a job named build-test.
jobs:
  build-test
runs-on
The runs-on represents a runner. A runner is a virtual server hosted by GitHub that runs your workflows when they are triggered by an event. You can set up your job to run on Ubuntu Linux, Microsoft Windows, and macOS virtual machines.
In this example, the code runs on the latest version of the Ubuntu Linux virtual machine.
runs-on: ubuntu-latest
steps:
The steps: contains all the processes that will run the job. In each step, you can run an action or script. Use the uses and run keyword to specify an action or script to run respectively.
uses:
Specify the uses keywords when there is an action to run. An action is a custom application for the GitHub Actions platform that performs a complex but frequently repeated task.
For instance, uses: actions/checkout@v3 will run version 3 (v3) of the actions/checkout application. This checks out your repository onto the specified runner (virtual machine).
Assuming you want to install Node.js on the runner, you will the action: uses: actions/setup-node@v3
run:
The run keyword executes a command on the runner. In the code snippet below, we are running npm i to install dependencies defined in our package.json on the runner.
You can run npm run build and npm run test to build and test the app on the virtual machine.
 - run: npm i
 - run: npm run build
 - run: npm run test
In this section, we covered GitHub Actions, and the constituents of a workflow file, and learned some terminologies.
In the next section, we will utilize the knowledge gained by building a React app and implementing CI/CD.
Part 2: CI/CD tutorial in React app
In this tutorial, we are going to:
Create a basic React application using
vite.Create a GitHub repository for our project
Set up CI/CD workflow with GitHub Actions in our project directory
Automatically Deploy the React app to GitHub Pages whenever a commit is pushed to the GitHub repository.
Creating a React app
We will be using Vite to create the React project. Vite is a tool to quickly start a project from a basic template for popular frameworks such as React, Angular, Vue, etc
- Copy and paste the code below into your terminal and press the
enterkey to spin up a React app. (Prior, change themy-react-appto your project name)
npm create vite@latest my-react-app --template react
Next, Vite will prompt you to select a framework. Select React.
Vite will also ask you to select a variant. Select JavaScript.
When the setup is complete, navigate to the project directory
Install the dependencies by running
npm installRun the project using the command :
npm run dev
Set up the GitHub Repository
Follow these steps to create a GitHub repository
Visit https://github.com/ and sign in to your account.
Click the "New" button at the top-right corner of the page
Select "Repository" from the drop-down menu
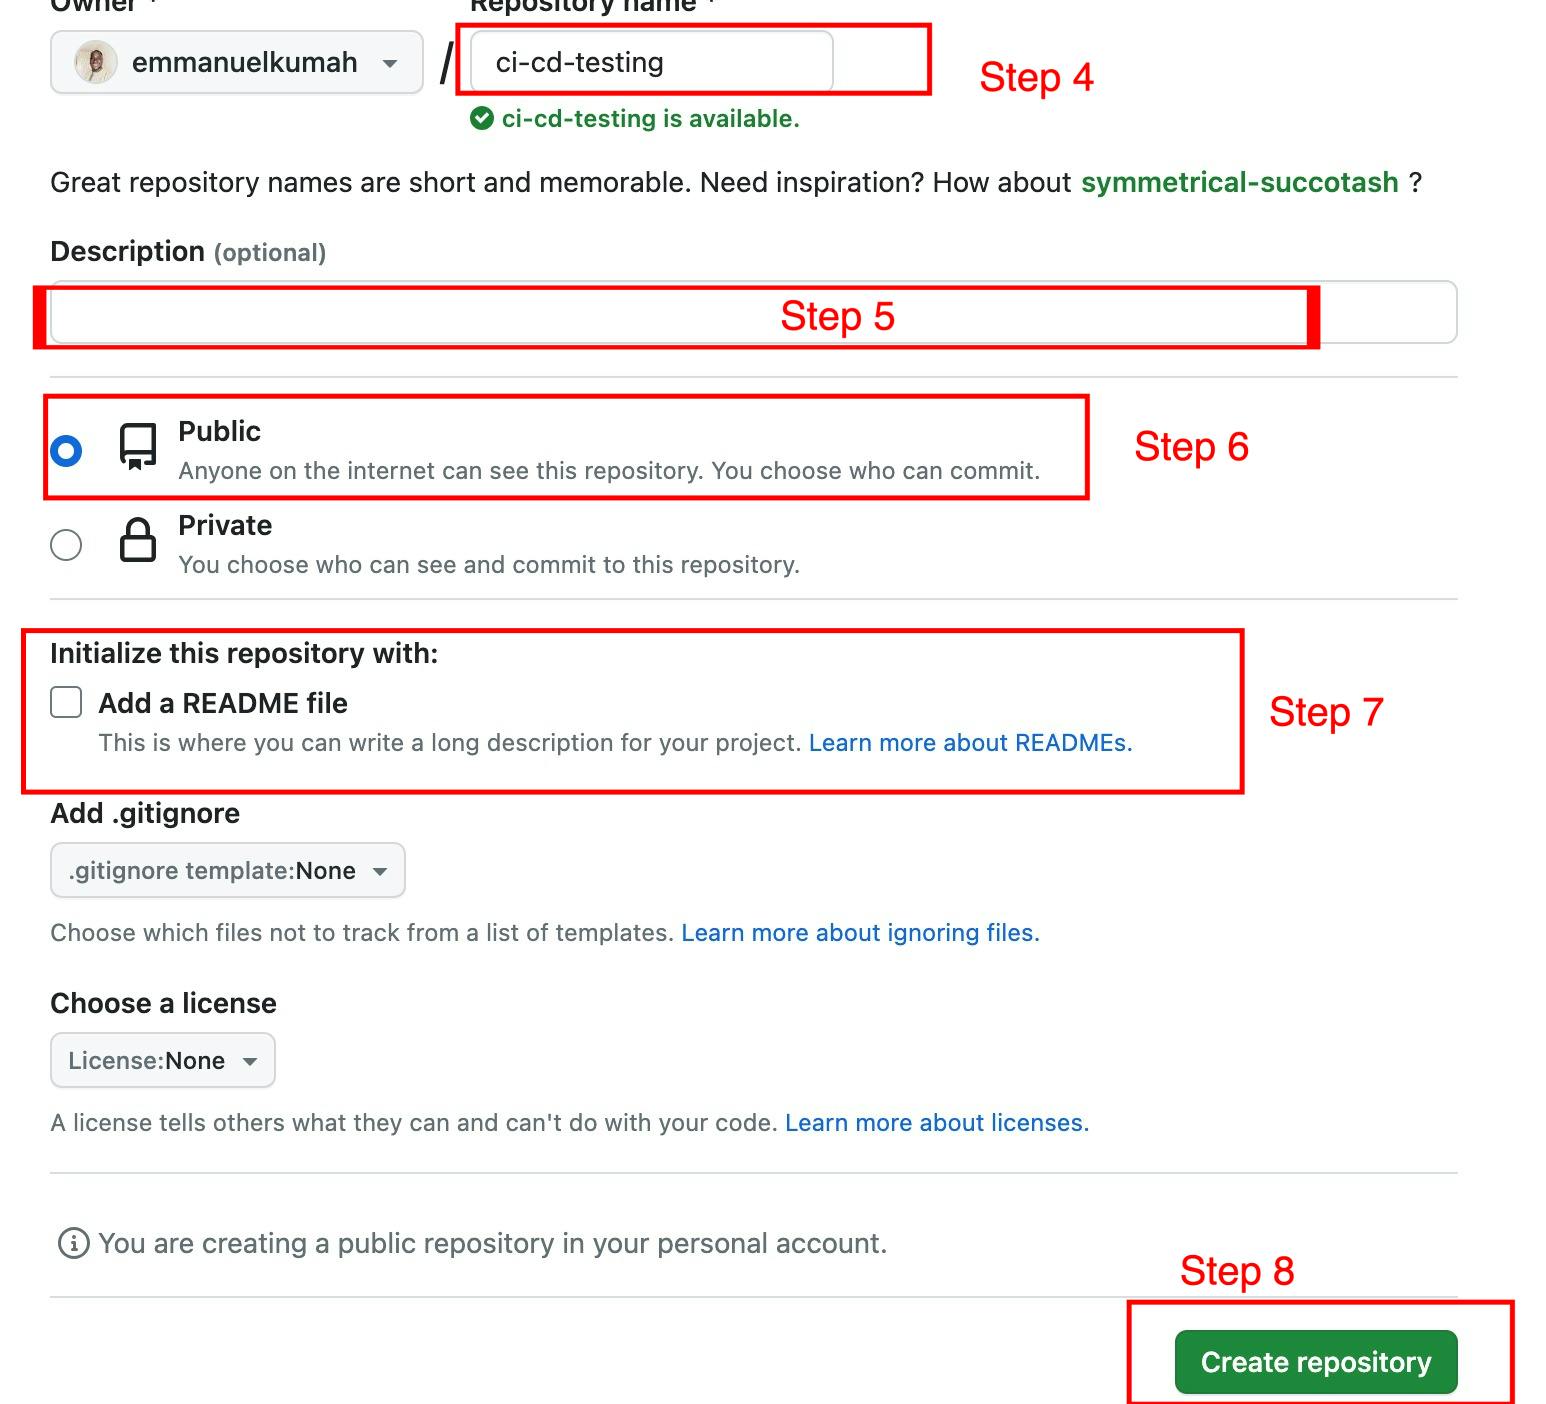
Enter the name for your repository in the "Repository name" field
(Optional) In the "Description" field, enter a description for your repository.
The default visibility for the repo is "Public" meaning anyone can see and access your repository.
(Optional) Select the "Initialize this repository with a README" checkbox to create a README file in your repository.
Click the "Create repository" button.
After successfully creating the repository, you can push your React project into the repo.
Copy and paste a similar command below from your GitHub page into the terminal window of your application
echo "# ci-cd-testing" >> README.md
git init
git add README.md
git commit -m "first commit"
git branch -M main
git remote add origin https://github.com/emmanuelkumah/ci-cd-testing.git
git push -u origin main
The command above will initialize the repository as a git project, connect the remote repository to the local project directory and finally push the local React project to the GitHub repository.
Configuring GitHub Action Workflow
Next, we will create the GitHub Action workflow in your project directory. This workflow will display "Hello World!" anytime you push code to the repository.
Navigate to the root of your project directory and create the
.githubdirectoryInside the
.github, create aworkflowsdirectory to store your workflow files.In the
.github/workflows/directory, create a new file calledci-cd.yml(the naming convention for the file is entirely up to you) and add the following code.
name: hello-world
on: push
jobs:
  sample-job:
    runs-on: ubuntu-latest
    steps:
      - name: my-step
        run: echo "Hello World!"
- Commit these changes and push them to your GitHub repository.
The GitHub Actions workflow file is now installed in your repository. It will run automatically each time a developer pushes a commit to the repository.
Displaying the activity for a workflow run
Whenever an event triggers your workflow, the workflow file will run. You can view the run's progress on your repository.
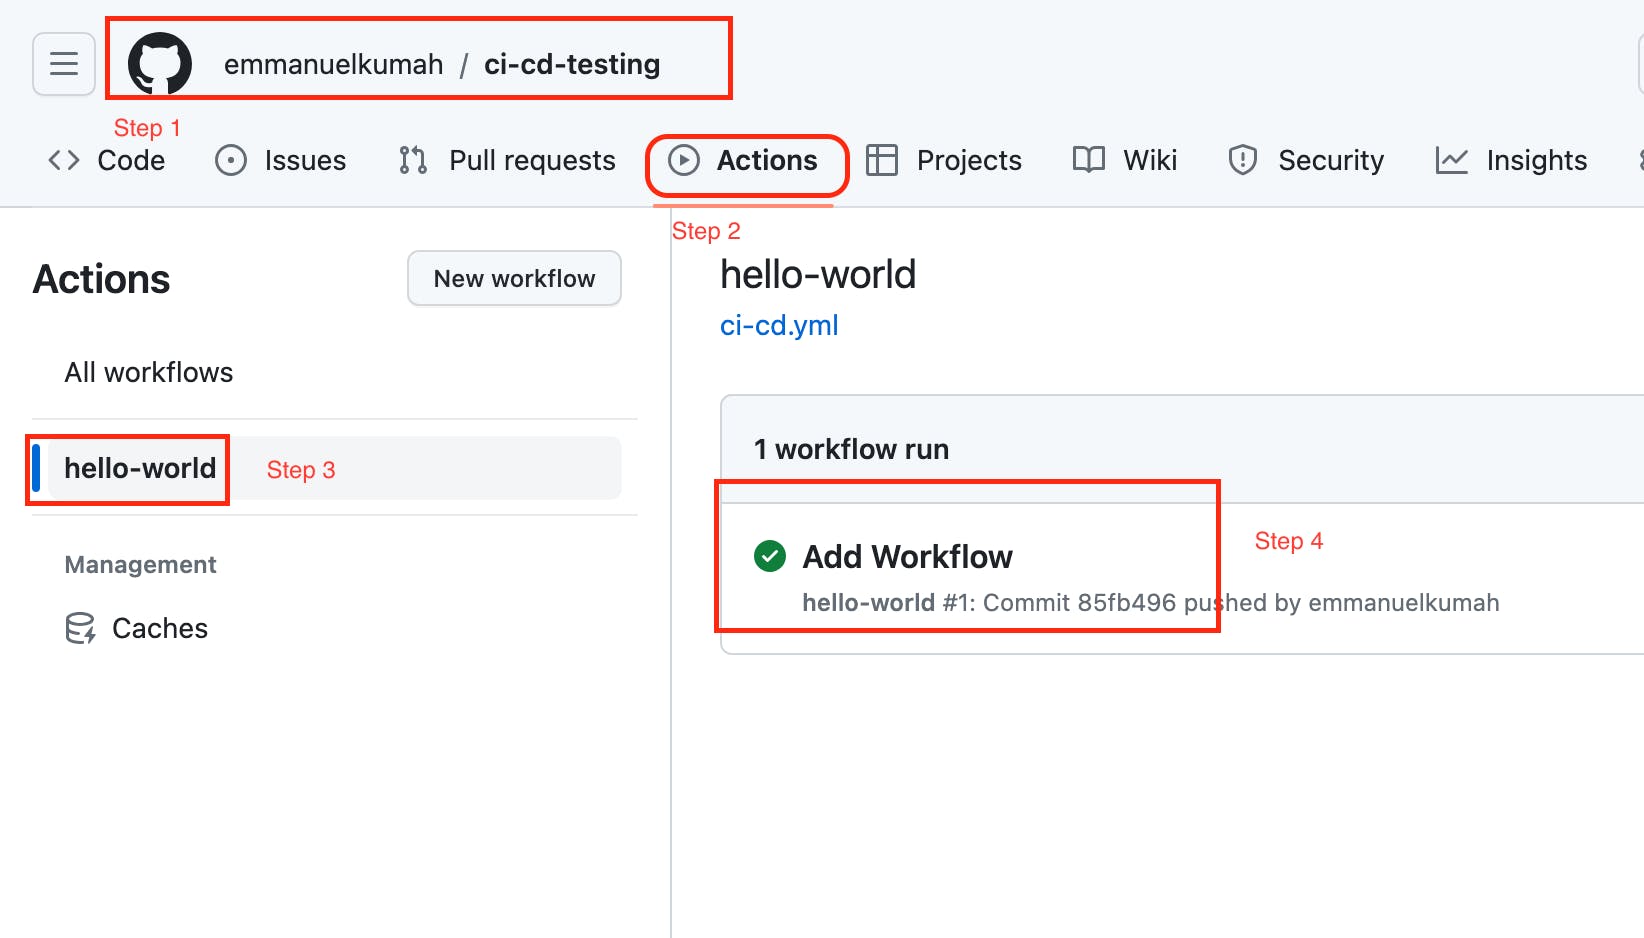
Navigate the main page of your GitHub repository
Click on the "Actions" tab on your GitHub repository
In the left sidebar, click the workflow you want to see. Our workflow is named "hello-world"
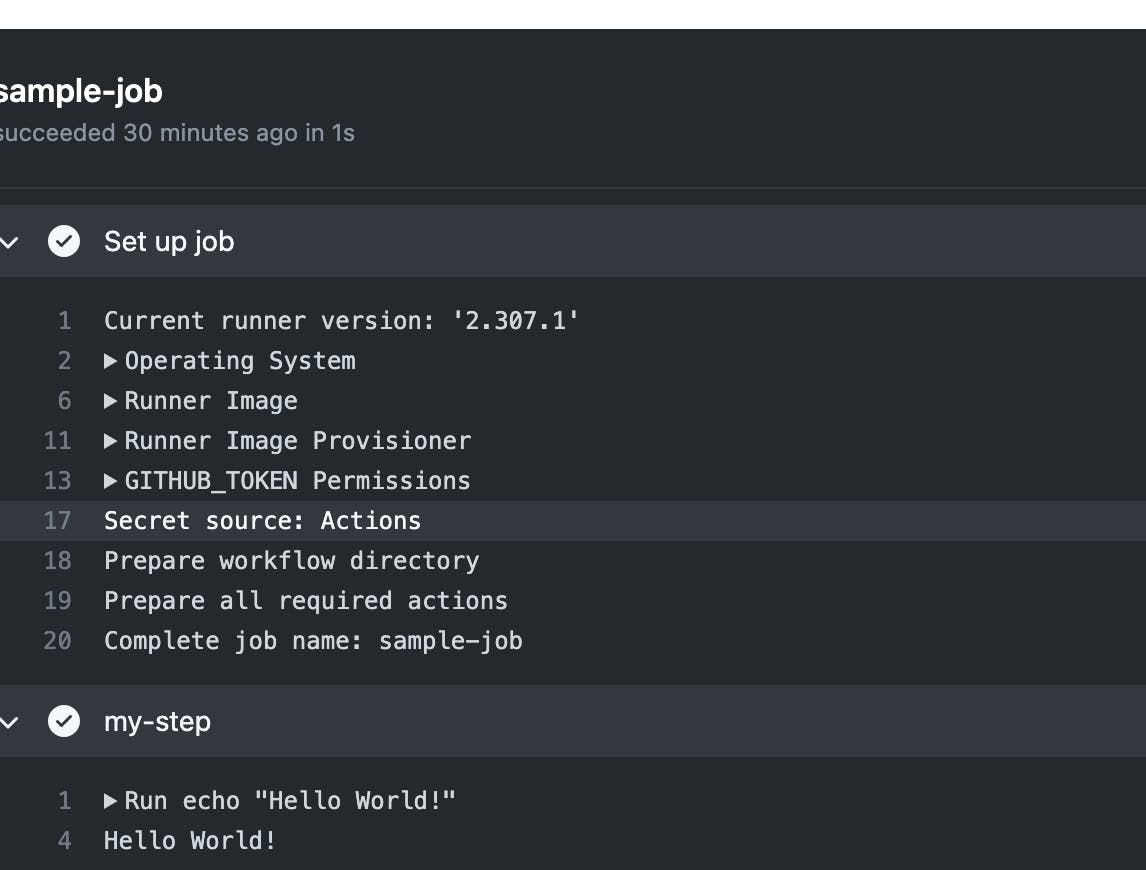
Click the workflow run to view the summary.
In the left sidebar, click the
jobyou want to see. We named our job sample-job
View the details of the job. It lists out all events occurring on the runner in real-time
Automating app deployment to GitHub Pages
In this section, we will add continuous deployment into our workflow. Whenever we push code to our repository, GitHub Actions will automatically build and deploy our app to GitHub pages. GitHub pages enabled developers to host websites directly from their GitHub repository.
Creating access token in GitHub
Before we can deploy our app to GitHub pages, we need to create a personal access token. Personal access tokens help access GitHub resources on your behalf. We will access the repository
Follow these steps to create a personal access token:
In the upper-right corner of any page, click your profile photo, then click Settings.
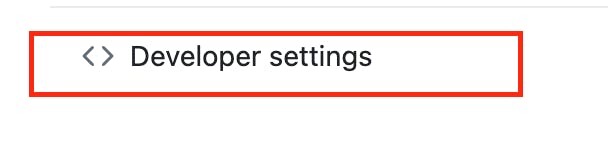
In the left sidebar, click Developer settings
In the left sidebar, under Personal access tokens, click Tokens (classic).

Select Generate new token, then click Generate new token (classic).
In the "Note" field, give your token a descriptive name.
To use your token to access repositories from the command line, select repo.
Click Generate token.
Copy the new token to your clipboard
We will use the access token in our Actions secrets in the repository. This will allow GitHub Actions to access our repo to deploy.
Follow the steps below:
Click on the Settings tab in your repository
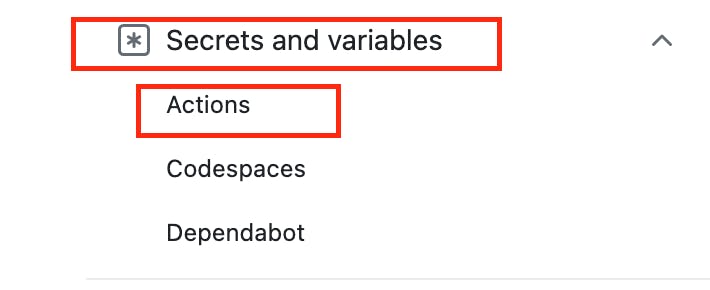
In the left sidebar, select Secrets and variables
From the dropdown, select Actions
Click on the New repository secret button
Enter the secret name in the Name field
Paste your copied personal access token in the secret field

Click on the Add Secret button
Later, we will reference the secret name in our workflow.
Initially, our workflow was set up to echo "Hello World!" whenever a commit is made to the repo. Now, we will modify our workflow files to contain two jobs:
Build
Deploy
The workflow for the build is as below:
name: DevOps-GitHibActions
on: push
jobs:
  # Build Job
  build:
    runs-on: ubuntu-latest
    steps:
      - name: Checkout Code
        uses: actions/checkout@v3
      - name: Install Node
        uses: actions/setup-node@v3
        with:
          node-version: 18.x
      - name: Install Dependencies
        run: npm install
      - name: Build Project
        run: npm run build
      - name: Upload artifact to enable deployment
        uses: actions/upload-artifact@v3
        with:
          name: production-files
          path: ./dist
Let's examine the stages:
First, we specify the name of the workflow as DevOps-GitHibActions (you can use any name)
The
on:pushevent will trigger the workflow whenever we push code to the repositoryWe specify the
jobto run asbuildruns-on: the job will run on Ubuntu virtual machine hosted by GitHubsteps: This details how to run the jobTo begin, we check out the source code on the virtual machine using the
actions/checkout@v3Next, we installed Node on the virtual machine using
actions/setup-node@v3, and specify which version of node to install usingwith: node-version: 18.xWe installed our NPM dependencies located in the
package.jsonfile on the virtual machine using the commandrun: npm installWe build our artifact using the command
run: npm run buildNext, we upload the artifact to the runner using the command
uses: actions/upload-artifact@v3Finally, we specify the
pathto the build usingpath: ./dist(distis the default build output location for apps built with Vite)
The next job is to deploy the app to GitHub pages.
The workflow is captured below:
...  // initial code remains the same, just add the following
 # Deploy Job
  deploy:
    # Add a dependency to the build job
    needs: build
    # Specify runner + deployment step
    runs-on: ubuntu-latest
    steps:
      - name: Download artifact
        uses: actions/download-artifact@v3
        with:
          name: production-files
          path: ./dist
      - name: Deploy to GitHub Pages
        uses: peaceiris/actions-gh-pages@v3
        with:
          github_token: ${{ secrets.CI_CD_TOKEN }}
          publish_dir: ./dist
deploy:signifies the name of the jobBefore deploying we will need the build artifacts. This is achieved by adding
needs: buildNext, we specify the virtual machine to run on using
runs-on: ubuntu-lateststepsto deploy the appFirst, we download the build artifact using
uses: actions/download-artifact@v3.We also specify the
pathto the build usingpath: ./distTo deploy the app to GitHub pages, we will use
peaceiris/actions-gh-pages@v3Now, at the
github_tokensection, we will need the personal access token to enable GitHub pages to deploy our app from the repository. We will indicate the secret name we set up earlier. (My secret was named CI_CD_TOKEN, yours will be different). The format is :github_token: ${{ secrets.YOUR_SECRET_NAME }}Finally, we specify the directory to publish the app using
publish_dir: ./dist
Updating the package.json and vite.config.js
Anytime you push code to your repository, the workflow will run, and the app will be built and deployed. However, if you visit your app on GitHub pages, it will display a blank page.
To fix this issue, go to your local repository:
Add the
homepageof the website to thepackage.jsonfileAdd the
baseURL to thevite.config.jsfile.
By default, a build is produced assuming your app is hosted at the server root. Because our app is located in a sub-directory of our GitHub domain, we specify the homepage in the package.json file
Add the snippet below to the package.json file
  "homepage": "https://emmanuelkumah.github.io/ci-cd-testing/"
// You can get the URL from your GitHub pages section
Next, locate the vite.config.js file in your local repository. Add the base section to the file
import { defineConfig } from "vite";
import react from "@vitejs/plugin-react";


export default defineConfig({
  plugins: [react()],
  base: "/ci-cd-testing/", // Add only this section
});
The base will set up the URL root of our website. For example, instead of displaying our app at https://emmanuelkumah.github.io/ (the Base URL is /), we will display our website at https://emmanuelkumah.github.io/ci-cd-testing/ by setting the Base URL to /ci-cd-testing/.
Finally, commit your changes to your remote repository
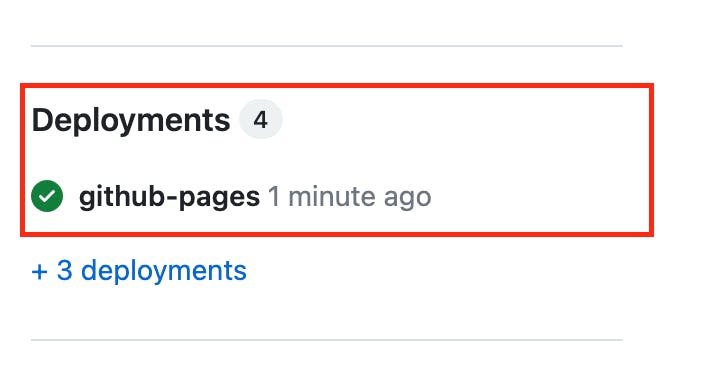
To view your new changes, on the right sidebar, click on the Deployments section, and click on the URL to view changes to the site.
Congrats, you have successfully implemented CI/CD in your React app. View the repo here
Summary
CI is a practice where developers merge all their code changes into a central repository early and often
Continuous delivery (CD) is a practice where code changes are automatically built, tested, and released to the production environment. It ensures that software can be released frequently with little resistance.
Setting up a CI/CD tool helps the team to focus on writing code and committing to the shared repository.
GitHub Actions is a CI/CD tool that handles the automatic building, testing, and deploying of code
This can save your team time and reduce the risk of errors in your software.